Create Breakout Rooms in Microsoft Teams
As you must have experienced, dividing a large gathering of people into smaller relevant groups leads to more focused discussions and better utilization of resources. The same concept can be extended in virtual meetings by using the “Breakout Rooms” feature as available in Microsoft Teams. Similar to real life, People in Microsoft Team meeting can be allowed to break off from the main meeting to join smaller group meetings. If required, participants can be allowed to join back with everyone else in the main meeting at any time, without the need to initiate and manage separate Zoom calls.
1. Create Breakout Rooms in Microsoft Teams
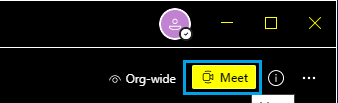
Follow the steps below to Create Breakout Rooms in Microsoft Teams. Open Microsoft Teams and click on the Meet Icon.
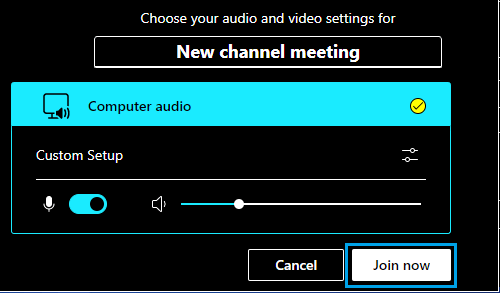
On New channel meeting screen, select your desired Audio/Video settings and click on Join now.
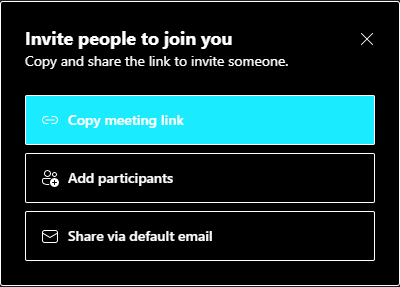
On Invite People screen, select the option to Invite people to join you in the meeting.
On the next screen, click on Breakout Rooms Icon.
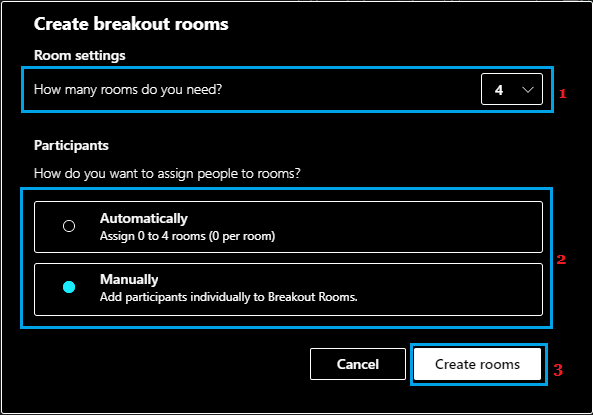
On Create Breakout Rooms screen, select Number of Rooms that you want to create (50 max), select whether you want Teams to assign members Automatically or Manually to rooms and click on Create Rooms button.
Note: You won’t be able to switch back to Automatic option, once you Create Rooms with Manually Add Participants option. On the next screen, you will see Breakout Rooms listed with no participants (if you selected the manual option) or with assigned participants (if you selected the Automatic option).
2. Rename Breakout Rooms
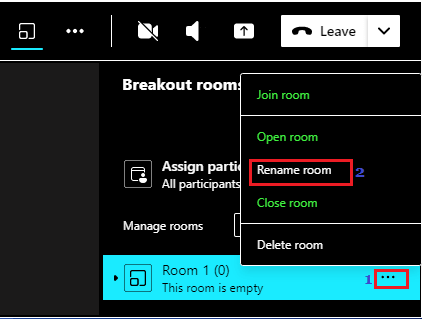
The Breakout Rooms created by Microsoft Teams will be named as Room 1, Room 2 and so on. However, you can easily customize the Rooms by renaming them. Click on 3-dots Icon, located next to the room that you want to rename and select Rename room option in the menu that appears.
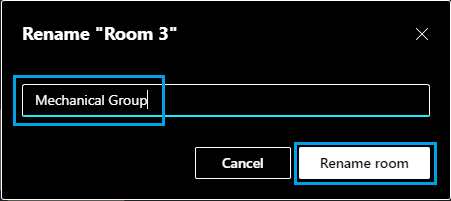
On the next screen, type the New Name for this Room and click on Rename room.
3. Assign People to Breakout Rooms
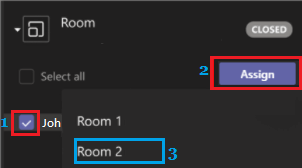
Once the Breakout Rooms are created, you can manually assign participants to Breakout rooms. Select Participants by checking the little Box next to Participants > click on Assign button and select your desired Room for participants.
Repeat the above steps to assign the remaining members to other Breakout Rooms.
4. Move Participants to Rooms
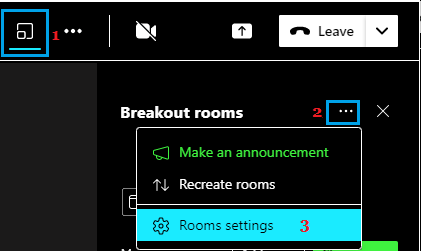
The default setting in MS Teams is to automatically move participants to their assigned Breakout Room, as soon as they join the meeting and prevent Participants from returning to the Main Meeting. However, you can change this default setting by going to by going to 3-dots menu icon > Room Settings.
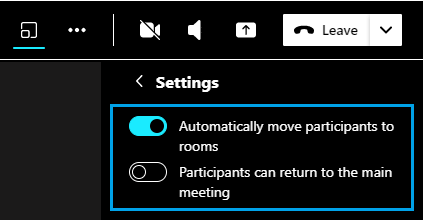
On the next screen, you can select your desired Room Settings.
5. Open or Close Breakout Rooms
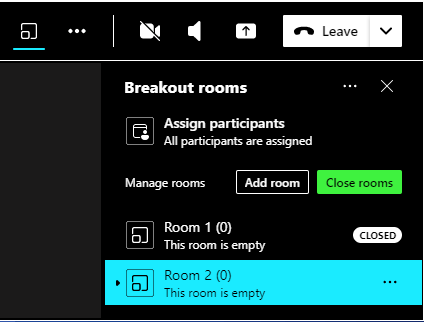
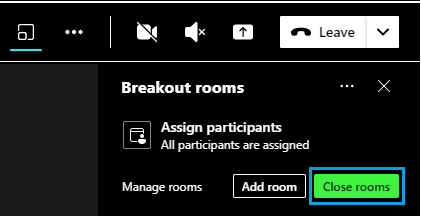
You can Open or Close all Breakout Rooms at once by clicking on Close Rooms or Start Rooms option, as it becomes available next to ‘Manage Rooms’ entry.
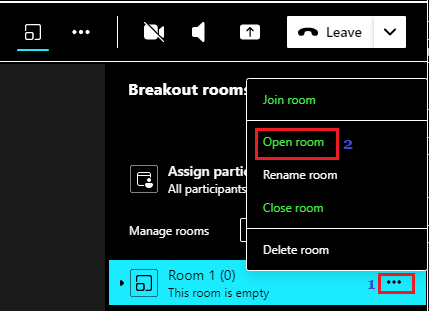
The other option is to Open or Close individual rooms by clicking on 3-dots icon next to the Room that you want to open and selecting Open Room or Close Room option.
Note: There is no restriction or limit on the number of Breakout Rooms that you can create in MS Teams.
How to See Everyone in Microsoft Teams Meeting How to Quit or Leave Microsoft Teams Group
![]()