Remove Duplicate Entries in Excel
Duplication of data in an Excel worksheet happens due to the same records being entered into the spreadsheet more than once and also while copying or combining data from multiple worksheets. While it is easy to find and remove duplicate entries in a small worksheet, removing duplicate entries from an Excel worksheet containing data in thousands of rows and columns is not easy. For such large worksheets, it is better to make use of the built-in Remove Duplicates tool in Microsoft Excel. This tool can help you find and remove duplicate entries in no time.
Steps to Remove Duplicate Entries in Excel Worksheet
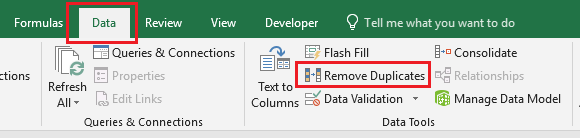
Follow the steps below to remove duplicate entries in Excel Worksheet 1. Click on any Cell in the worksheet that contains duplicate entries. 2. Next, click on the Data tab and then click on Remove Duplicates option in the Data Tools section.
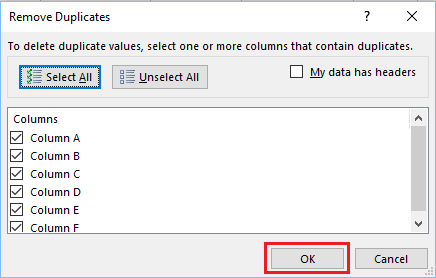
3. On Remove Duplicates screen, select the Columns that you want to search for duplicates and click on OK.
By default, all the Columns will be Pre-selected in Remove Duplicates dialog box. If you are not sure about where the duplicate entries are, you can leave all the Columns checked and click on OK. 4. Wait for Excel to scan for duplicate entries. Once Excel has removed duplicate entries, you will see a Message, informing you about the number of duplicate entries found and removed by the “Remove Duplicates” tool. As you will agree, this method is quicker and lot better than painfully searching for duplicate entries and removing them manually.
How to Hide Cells, Rows and Columns In Excel How to Hide Formulas in Excel